RODOGRAU Build a Street Montadinha
Kits, separate paint passes, traseira removal, Titan parts, and portable workshop workflow for a custom RODOGRAU street look.
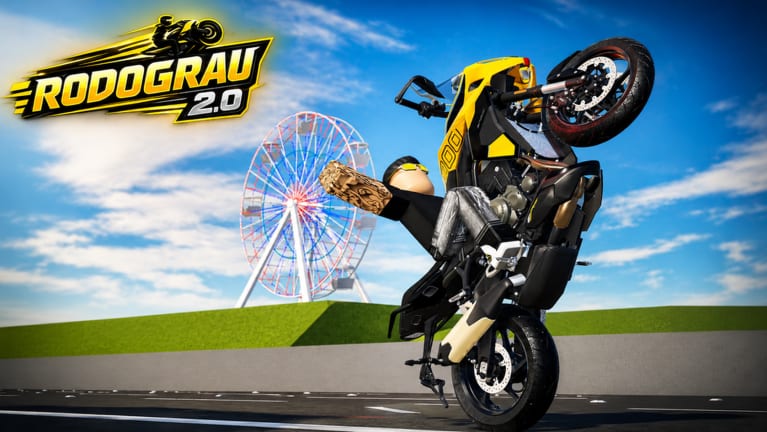
A montadinha in RODOGRAU is not just a random paint job. It is the intentional “built” street motorcycle look: mixed kits, stripped sections, layered colors, and parts that feel assembled by hand rather than left stock. Brazilian street culture treats a montadinha as a statement bike — loud silhouette, custom plastics, and details that stand out in a comboio. This guide walks through the workshop flow that players use to create that look inside RODOGRAU 2.0.
Before you chase multi-color kits, make sure you can enter the garage cleanly and understand basic stripping. The Depenada guide covers reverse entry, part removal, and /ofc. Use this page when you are ready to assemble a full montadinha instead of only peeling fairings.
What “Montadinha” Means in RODOGRAU
In community language, montadinha points to a custom street build that looks pieced together on purpose. Think Titan-family plastics, side wings, a removed or reshaped rear, and paint that does not match every panel. The bike should feel personal: some riders keep a clean two-tone tank and frame, others go full kit mash with asa lateral pieces and aggressive traseira deletes.
Montadinha sits next to depenada on the customization spectrum. Depenada emphasizes stripping. Montadinha emphasizes building — adding kits, painting in stages, and reassembling parts so colors and shapes clash in a controlled way. Many of the best screenshots start from a free or mid-tier bike, then climb through kit menus until the silhouette stops looking factory.
If you are still choosing a base motorcycle, skim the motorcycle tier list for platforms that take kits well, then return here for the assembly order.
Workshop Access: Garage Reverse and /ofc
You customize from two places:
- Physical garage — Ride to the workshop district (Francisco Morato area), stop at the bay, and enter in reverse (de ré). Forward entry often fails to open the menu.
- Portable workshop — Type /ofc in chat if you own the workshop gamepass. The portable bench lets you kit and paint anywhere on the map.
Reverse entry is non-negotiable for the fixed garage. Practice the approach on an empty lot: slow with S, turn the bike, hold reverse, and roll in straight. Once the menu opens, do not rush. Montadinha builds fail when players bolt every kit on first and only then notice they painted the wrong layer.
Keep Codes & Commands bookmarked for /ofc and related part commands such as /peca and /peca2 when your session supports them.
Core Build Loop for a Montadinha
A clean montadinha usually follows this order:
- Pick a base bike that accepts Titan-style kits.
- Open the garage or /ofc workshop.
- Remove stock rear pieces (traseira) you do not want in the final silhouette.
- Add structural kits (Titan 24 / Titan 25, body kits, side pieces).
- Paint the frame / base body first.
- Re-add or swap kits afterward so kit plastics can take a second color.
- Finish with asa lateral and small accents.
- Exit, ride a short test loop, then return for micro-adjustments.
That paint-then-rekit pattern is the secret to multi-color montadinhas. If you paint after every kit is already locked on, the whole bike often reads as one flat color. If you paint the naked frame, then layer kits, the new plastics keep contrast.
Removing the Traseira
The rear section (traseira) is one of the first deletes on street builds. Removing it shortens the bike visually, exposes more of the rear wheel and swingarm area, and makes later kits look intentional instead of bolted onto a stock tail.
In the customization menu:
- Locate rear / tail / traseira options for your model.
- Remove the stock rabeta or rear cover set.
- Check the side profile before adding replacement kits.
Some riders leave a minimal rear piece; others go fully open. Either choice can work as long as the front kits and tank plastics still balance the silhouette. If the bike looks unfinished after the delete, that is normal — kits and paint come next.
Titan 24 / 25 Kits and Asa Lateral
Honda Titan-inspired kits are the backbone of many RODOGRAU montadinhas. Titan 24 and Titan 25 kit sets give the bike the familiar Brazilian street plastics that players recognize instantly in screenshots and comboios.
How to use them well:
- Install the Titan kit family that matches the look you want (24 vs 25 styling cues).
- Add asa lateral (side wing / side cover pieces) after the main body kit so the sides read wider and more aggressive.
- Avoid stacking every optional plastic at once. A montadinha should look built, not cluttered.
- After the first kit pass, exit the menu, orbit the bike, and decide which panels deserve a second color.
Asa lateral pieces are especially useful when the tank and mid-body feel too plain after a traseira delete. They create horizontal lines that photograph well during grau and night rides with headlights on.
Multi-Color Paint: Frame First, Kits Second
Multi-color is what separates a quick garage visit from a real montadinha.
Recommended paint workflow:
- Strip or minimize kits so the frame and primary body are exposed.
- Apply your base color — matte black, racing red, white, or a metallic that fits your rider outfit.
- Confirm the frame color in daylight and at night.
- Re-add Titan kits / asa lateral / remaining plastics.
- Paint those kit pieces a contrasting color, or leave selected plastics unpainted if the menu preserves a second tone.
- Repeat for small accents if your bike supports separate part colors.
Popular contrast pairs in the community include black frame with colored Titan kits, white plastics over a dark chassis, and two-tone schemes where the asa lateral breaks the midsection. Match helmet commands from chat so the rider does not clash with the bike — see Codes & Commands for /cap options.
If a part refuses to take a second color, remove it, paint the layer underneath, then reinstall. That remove-paint-readd loop is slower but produces the layered street look montadinha riders want.
Controls You Need While Building
Workshop work still uses riding hotkeys. You need confident reverse for garage entry and clean throttle control when testing the finished bike. Refresh the Controls & Hotkeys page if W/S reverse or night headlights still feel awkward. A beautiful montadinha that you cannot reverse into the garage is unfinished work.
After each major kit change, take a short ride:
- Check whether the new silhouette blocks your view.
- Test a low-speed grau with T on a quiet street.
- Flip headlights with L at night to see how colors read under light.
Handling can feel slightly different after heavy depenada or kit changes. That is expected. Adjust your practice streets using the map guide if needed.
Starter Montadinha Recipes
Use these as templates, then improvise:
Clean Titan Street — Remove traseira, install Titan 24 or 25 kit, paint frame dark, leave kits lighter, add subtle asa lateral.
High-Contrast Night Build — Matte black chassis, bright kit plastics, headlights ready for night avenues, minimal rear.
Full Kit Mash — Traseira delete, Titan kit, asa lateral, extra body pieces, two paint passes, then a test comboio lap to see what still looks stock.
Light Depenada Hybrid — Strip mirrors and rear first (see Depenada), then rebuild only the kits you care about so the bike stays light for grau.
Pick one recipe and finish it before opening every menu toggle. Finished > endless tinkering.
Common Montadinha Mistakes
- Entering the garage forward and thinking customization is broken.
- Painting last after every kit is installed, then wondering why the bike is one color.
- Stacking Titan kits plus every optional plastic until the silhouette is noisy.
- Forgetting /ofc exists and riding across the map for every tiny paint tweak.
- Ignoring the tier list and fighting a base bike that barely supports the kits you want.
- Never testing the bike in motion after visual changes.
Avoid those and your builds improve immediately.
Show the Build
A montadinha is meant to be seen. Take Shift+C screenshots, join a group ride, or park under street lights so the two-tone kits pop. When you are happy with the result, compare other community bikes, then iterate. Customization in RODOGRAU is never truly finished — that is part of the culture.
Related Guides
- Depenada & Customization — Stripping, garage reverse, portable workshop basics
- Controls & Hotkeys — Reverse, lights, and riding keys used between workshop visits
- Motorcycle Tier List — Base bikes worth turning into montadinhas
- Codes & Commands — /ofc, /peca, helmets, and other chat tools
Build slow, paint in layers, and reinstall kits on purpose. That is how a stock spawn becomes a montadinha worth parking in the middle of the street.
Frequently Asked Questions
Quick answers to the most common questions about RODOGRAU.
What is a montadinha in RODOGRAU?
A montadinha is a custom "built" street motorcycle look: mixed kits, stripped rear sections, layered paint, and parts assembled for style. It focuses on building a personal street silhouette rather than leaving the bike stock.
How do I get multi-color paint on kits?
Paint the frame or base body first, then re-add Titan kits and asa lateral pieces so the kit plastics can take a contrasting color. Painting only after every part is installed often forces a single flat color.
Do I need to remove the traseira for a montadinha?
Removing the traseira (rear section) is common because it shortens the silhouette and makes Titan kits and asa lateral pieces look intentional. You can keep a minimal rear if you prefer a less stripped profile.
How do I open the workshop to build kits?
Ride to the physical garage and enter in reverse (de ré), or type /ofc in chat if you own the portable workshop gamepass. Forward garage entry often fails to open the customization menu.
Which kits matter most for a Titan-style montadinha?
Titan 24 and Titan 25 kit sets plus asa lateral side pieces are the usual foundation. Start with those, remove the stock traseira, then layer paint before stacking every optional plastic.